


Making a DIY bar cabinet allows us to have a design, appearance, and storage configuration that is exactly to our personal preference. The integration of lifting mechanisms for hidden storage not only offers more security, but it also serves as a cool surprise factor for visitors. If you were thinking of building your own homemade DIY bar cabinet at an affordable cost, this article is just for you! We will be covering how April Wilkerson made a DIY Bar Cabinet with our TV lifting mechanism for her hidden storage!
Making a Cutting List and Hidden Storage

April made a set of plans with a cutting list for this build as a reference. She starts by cutting the needed parts out of hickory wood and milling them to their final dimensions. Each part is labeled with a piece of tape so April can find whichever part she needs. The four solid wood parts needed for the body of the hidden shelf are laid out while paying attention to which areas would be seen in the final product and being intentional about the direction it faces.

For joinery on almost this entire build, April uses a simple Rockler Dowling Jig. After lining up the joining boards and drawing a pencil mark across the seam, the Jig clamps into place for drilling a hole to the needed depth. The depth of the hole is based on the length of the dowels you use. There is a collar on the bit that can easily adjust to the needed depth.

After drilling the holes, April assembles the body of the shelf. Since the drying of wood glue only allows three to five minutes to get things set in the clamps, April places everything she will need ready for preparation. When using dowels, April always places a small amount of glue in the hole and then taps the dowel into the hole using a mallet. It is important not to hit with too much force as this could distort the dowel’s shape. Then, April places the glue in the mating part before setting it on the dowel.

Once things are seated all the way, April sets a few clamps on them and checks for perfectly square corners before letting the glue dry.

While the glue dries, April drills the pocket holes for the plywood panel that will be on the back of the shelf. Examining both sides before drilling allows April to choose which would be the final seen face. Using pocket holes here will not be an issue since they will not be visible once she finishes the project. After drilling all around the perimeter of the back panel, April sets it in place and attaches it with screws.

A lift mechanism will later be integrated for this project to have a hidden storage compartment that can raise and lower. April attaches one more wooden support piece as the “lip” on the back side using screws and wood glue for extra security. This is to ensure the lip can handle the weight of the hidden shelf and the items placed on it when it will later rest on the lift mechanism.
Constructing the Cabinet’s Body

April cuts in a small taper at the base of her wooden hickory pieces to create a foot. Before making any cuts, drawing an “X” on two sides can help prevent mistakes when cutting wood. The Rockler Taper Jig easily allows April to chop away the materials that were not needed on two sides.

Once the pieces are ready, April starts assembling the sides of the cabinet’s body together. A few things to consider during assembly:
- Do a dry fit before applying glue.
- When applying glue, add just a dab.
- Sand all the wooden parts before assembling to save time in the end.
- Do your best to prevent glue squeeze out when joining pieces.
- Using a bottle is great for accurately getting glue in the holes but also use a chip brush to get glue on the edges as well.
- A rubber mallet is better when more force is needed to seat the wooden pieces all the way.
- If you only have a wooden mallet, use scrap pieces of wood on your board to prevent it from getting marred.
After completing the first side, April repeats the same process by making her second side the same way. She also puts together the assembly that the lift mechanism will later rest on.

Once the glue has dried for the sides of the cabinet’s body, April continues with building the rest of the body by joining the sides together using the middle pieces. To avoid mixing up the configuration, April does a dry fit and places all the parts in position and proper orientation. As soon as she starts applying the glue, this preparation allows her to run through the assembly efficiently. The first step is applying glue inside each of the dowel locations, and then tapping the dowels in. The second step is to apply a little glue to the ends of each part and then tap them into place.

The third step is trickier; however, April successfully aligns all 14 dowels at the same time quick enough to avoid the glue from setting up too early. She then secures the pieces into place further by using a rubber mallet to force them in.

She turns the cabinet’s body sideways and then set it in clamps for a few hours to dry. While drying, she proceeds to cut all the plywood panels that will go into the different sections. April cuts them all oversized to start so that she could wait until the body was done and get an exact measurement of what each one needs to be to secure in place.
Securing the Wooden Panels

To secure the side panels of the cabinet, April drills a few pocket holes on the inside face. When going into hardwood, pre-drilling through the pocket holes help to prevent splitting once you run in the screw. After installing both side panels, April proceeds with the center panel. Since there is no lip for it to rest on, scrap wood allows April to set the big center panel in place at the right height. She then flips the unit over to have better access to the underside and secures the next few panels under the cabinet. Clamping a scrap board to the underside of the rails can help you achieve a flush surface to rest the panel on while securing it.

When installing the middle shelf, April clamps the wooden panel securely and then uses a right-angle attachment to drill and screw the pieces together in a tight working area.

For the cabinet’s top, April places a few boards that will later give the needed surface to attach some door hardware. She then splits the top compartment into two by adding a center divider.
Integrating the Lift Mechanism

April moves back to the shelf assembly which she started the build off with and adds in some threaded inserts into the back panel. The placement of these inserts line-up exactly with our TY-01-25 TV lift. This model is typically used for raising and lowering TVs, however, the versatility of electric linear actuators found inside the lift allows for uses in a variety of applications such as a liquor shelf lift.

The TY-01-25 easily secures down into the support numbers of the body. Then, April places the final back panel in so that she could go to the inside and trace the hole locations with a pencil. After punching through with a drill bit, she sets it back into place then secures it to the lift with bolts. She then goes around the border and screws in all the necessary pocket holes. April does a cycle test on the TY-01-25 for the first time while it was attached to the base of the cabinet and found it lifting very quietly with smooth motion.

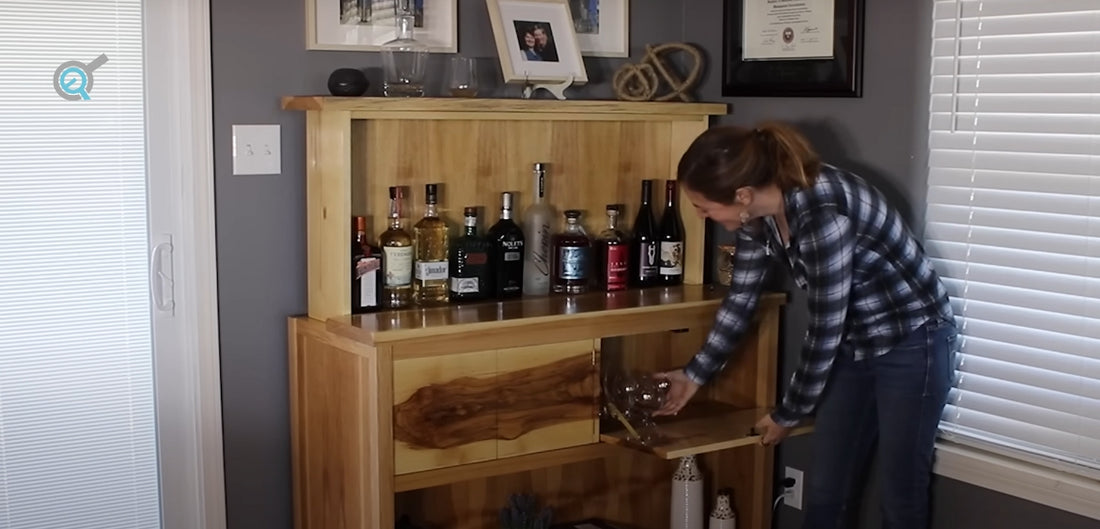
The hidden shelf earlier in the build is set on top of the extended TY-01-25 using the lip. While it is resting, April secures it in place with bolts through the threaded inserts. She performs a second test with the hidden shelf loaded on. Aside from the front corner rubbing just slightly when retracting, the hidden shelf could fully extend and lower the required heights quite well.
Adding a Top Cover

The cabinet’s top will have two sections so that the back hidden shelf can rise and lower independently with the top’s back piece as a floating cover while the top’s front piece stays fixed in place. April selects the pieces of wood she wants for the top and cuts them into shape using a table saw. She fixes the top’s front piece first by ensuring there is an even overhang on all three sides and uses a combination square to make sure it is uniform. A clamp helps to pin a corner once it is in a good position while the other side gets adjusted. Then, April pins them in place from the underside with the pocket holes which were previously drilled in the rails.

For the top’s back piece, April sets a collar on a drill bit and then counterbores into the body. The depth doesn't really matter but straightness does because she will thread in some screws later. She uses screws that have a decent number of threads but also have an unthreaded portion near the top.

This allows April to cut the heads of the screw off using a grinder to create pins sticking out of the body. These pin locations are later transferred to the underside of the floating top’s section. April then counterbore more holes that are slightly larger than the pins with the goal of setting the top in place and not struggle to go on.

She later places the top’s back piece on top of the extended hidden shelf. This allows her system to raise and lower successfully without interfering with the front section. She went ahead and set the upper limit so that the bottom of the shelf will land flush to the top’s front.
Mounting Doors For the Cabinet

April wanted doors made from a piece of wood that had a ton of contrast character and a large visual impression. She waited until this point to cut them with her table saw so that they will be exactly the right size and so she could make the doors have continuous grain from left to right.

Using her Rockler jig again, April puts a few dowels in the center partition so she can glue a portion of solid wood that would cover up the end. Next, April starts attaching the hardware so that the right compartment will have a drop down door. She places two non-mortise hinges on the bottom and a catch on the left.

For a sneaky design theme, she decides to install Safe Push Touch Latches horizontally on the underside of the drawer opening. The tricky part here is getting the depth correct so that the door comes out flush to the reveal you aim for. In this case, it is flush to the center partition. This mechanism keeps things simple by only needing the push of a finger to open and close the doors.

For fun, April changes it up by having two swing doors for the other side of the cabinet. She mounts hinges on the sides instead of the bottom. Since the left swing door was correctly installed, April uses a combination square to successfully get the right door set to the same depth on her second try.
Applying the Finishing Touches

For the protective coating, April first applies a coat of Gleam’s wood sealer which fills in the grains, seals wood fibers and levels wood surfaces to make for an ultra smooth finish. This layer needs to dry for about two hours before the next step.

For the second layer, she applies Total Boat Gleam 2.0 (Gloss) and builds up three coats of gloss, waiting an hour in between coats. Once she reaches her forth coat, April switches to Total Boat Gleam 2.0 (Satin). If you use matte or satin to build up the layers instead of Gloss, this can sometimes create a cloudiness. Because of this, a gloss for the build up is recommended before using the final top layer of your choice. After the finish is dry, April moves the DIY Bar Cabinet into the house and puts everything back together.
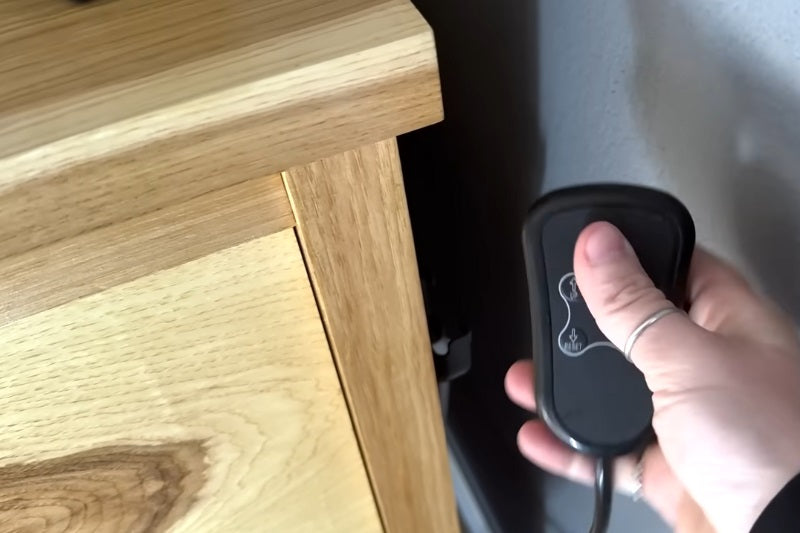
April places Velcro to the right side of the cabinet for holding our TY-01-25 wired remote. With a simple push of a button, the bottles raise up with exceptional stability and smooth motion. Sneaky and hidden, this style of hidden storage for the DIY Bar Cabinet also helps in maintaining a tidy and more organized appearance!

To see the DIY Bar Cabinet in action and its build process, check out the video below!
IN SUMMARY
By following a few steps and using the right supplies, April now has her very own DIY Bar Cabinet with hidden storage! For more cool projects by April Wilkerson, feel free to visit her Youtube channel!
Thank you to April for sharing your project - We are delighted to see you enjoying the new DIY Bar Cabinet!
If you have any custom projects, applications, or technical questions about our products, feel free to reach out to us anytime. We are experts in what we do and will be happy to assist you with your future custom projects!
sales@progressiveautomations.com | 1-800-676-6123