


Molex connectors date back to the 1950s. These easily configurable I/O connectors quickly became an industry standard, making assembly and reconfiguration easy and reliable. Adding connectors to wires helps with connectivity and allows for plug-and-play compatibility with electrical devices in consumer appliances, automobiles, or computers. This guide will provide an overview of how to install and remove these connectors, including crimping Molex connectors alongside how to remove pins from a Molex connector.
What You Will Need
Let’s begin by taking a look at the components that will be involved:
- Wires
- Molex Mini-Fit Jr. Female Power Connectors
- Molex Mini-Fit Jr. Male Power Connectors
- Molex Mini-Fit Jr. Receptacle Housing
- Molex Mini-Fit Jr. Plug Housing
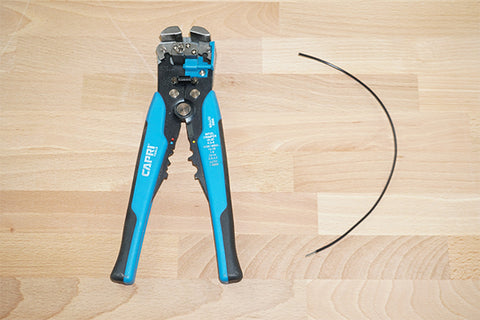
- Molex Crimping Tool (or a generic crimping tool)
- Header Pins

All the connectors and housing used in this tutorial are rated for usage with 18 to 24 AWG wire. If a thicker gauge wire is going to be used (< 18 AWG), the part numbers provided in this tutorial will not apply. However, similar Molex accessories can be used. The connector housing requires the use of male Molex metal pins and female Molex connectors. The receptacle housing will contain the female Molex pins, and the plug housing will contain the male power connectors.
Follow the 3-part process below to connect wires to a Molex connector, as well as how to remove a wire from a connector without doing damage.
Part 1: Stripping the Wire and Adding the Power Connectors
Begin by using a wire stripping tool to strip back enough wire, ensuring proper connection when crimping on the power connectors. The amount of exposed wire should not exceed the length of the power connectors insulation and crimp zone, which is 5mm. Therefore, the optimal length of exposed wire is 2.5 mm (the length of the crimp zone).
With the stripped wire inserted into the un-crimped power connector, load it into the crimping tool.

Alternatively, insert the un-crimped power connector into the crimping tool without the wire, and then feed the wire into the connector (either way works). Clamp down on the crimping tool and release.

Ensure the correct power connector is crimped onto the wire depending on if you use Molex connectors that are male or female.
Part 2: Adding Wires with Crimped Power Connectors to the Connector Housing
The crimped wires can now be fed into the connector housing. The orientation of the wires can be based strictly off preference and will depend on the Molex wiring required for the type of system that you are working with. For example, a Progressive Automations control box may require the actuator wires to have a designated orientation to obtain an extend and retract sequence that correlates to the ‘up’ or ‘down’ activation buttons on a wireless remote.
There are two housing options available, namely, a male housing (female power connectors) and a female housing (male power connectors).
Male Housing (Female Power Connector)

Female Housing (Male Power Connector)

If the power connector pulls out or the wire comes loose, it means that your crimp was faulty. Try crimping the wire again and inspect the crimp before inserting it into the housing.
To disconnect a Molex connector (male and female connection), simple press down on outside clip and pull the connectors apart.

The power connectors have hooks that allow the connectors to latch into the connector housing. Once the crimped wire has been inserted into the housing, it will be difficult to remove. However, there is a method of removing the wire from the housing without damaging the power connector.
Part 3: Removing Wires with Crimped Power Connectors from a Housing
Since there are two hooks keeping the connectors in place within the housing, they will need to be pushed back to release the wires. In this tutorial, we are using flat header pins that are used to release the hooks. This is completed by pushing the header pin into the thin gap between the metal power connector and the plastic on both sides of the housing.
Since there are two hooks keeping the connectors in place within the housing, they will need to be pushed back to release the wires. In this tutorial, we are using flat header pins that are used to release the hooks. This is completed by pushing the header pin into the thin gap between the metal power connector and the plastic on both sides of the housing.


Once the header pins push back the hooks, Molex connector pin removal is simple, and the wire can slide out of the housing by pulling back on it without causing any damages to the power connector.

Removing the wires without damaging the connectors is a simple method of enabling users to switch the polarity of actuator wires without needing to obtain additional Molex connectors or Molex housing.
For further questions, reach out to us at sales@progressiveautomations.com