
Comment dimensionner un actionneur linéaire pour votre projet
Choisir le mauvais actionneur est une perte de temps, d'argent et parfois de matériel. Un modèle sous-dimensionné se bloque sous la charge. Un modèle surdimensionné coûte plus cher que nécessaire et risque de ne pas convenir à l'espace disponible. La réussite d'un projet se résume souvent à cinq minutes de mesure et quelques calculs simples.
Ce guide vous explique précisément quoi mesurer et à quoi penser. Une fois vos données recueillies, il vous fournit un modèle de requête prêt à l'emploi, compatible avec tous les assistants IA (ChatGPT, Claude, Gemini, etc.) pour calculer les spécifications des actionneurs nécessaires à votre projet. Aucun diplôme d'ingénieur n'est requis.
Pour faciliter cette étape, nous avons créé un outil gratuit
Calculateur de dimensionnement d'actionneur linéaire
Cet outil permet d'estimer la force, la course, la vitesse et les spécifications de base nécessaires à votre projet. Une fois vos mesures effectuées, vous pouvez ouvrir le calculateur, saisir les détails de votre projet et utiliser les résultats comme point de départ pour choisir l'actionneur adapté.
Vous vous demandez comment dimensionner un actionneur linéaire électrique ? Cet article vous propose un guide pratique pour vos projets de bricolage, d’amélioration de votre maison et d’automatisation. Vous pouvez également utiliser les outils ci-dessous, comme un calculateur d’actionneur simple, un calculateur d’actionneur linéaire ou un calculateur de taille d’actionneur linéaire, avant de choisir un modèle spécifique.
Premièrement : quel type d'application développez-vous ?

Les projets d'actionneurs linéaires se répartissent en deux catégories, et l'approche de dimensionnement est différente pour chacune.
Actionnement direct par poussée ou levage. L'actionneur pousse ou tire une charge en ligne droite. Par exemple : soulever une plateforme, monter un téléviseur, régler la hauteur d'une table ou ouvrir un panneau coulissant. Cela peut inclure un actionneur de levage électrique pour un projet de télévision, où l'actionneur monte ou descend un panneau ou un meuble TV. Le calcul de la force est simple : l'actionneur doit déplacer le poids de l'objet, divisé par le nombre d'actionneurs qui se partagent la charge.
Articulé ou pivotant. L'actionneur ouvre un élément pivotant autour d'un axe de charnière : trappe, porte de poulailler, couvre-benne, porte de cave, puits de lumière ou fenêtre basculante. C'est souvent là que les bricoleurs se trompent, car l'actionneur ne supporte pas tout le poids du panneau. La force nécessaire dépend de son point de fixation par rapport à la charnière, et cette force varie selon l'ouverture du panneau. La course requise est également entièrement déterminée par la géométrie de fixation. C'est pourquoi, pour ce type d'installation, il est indispensable d'utiliser un calculateur d'angle d'actionneur linéaire, un dimensionnement d'actionneur linéaire pour porte articulée ou un système d'actionneur pour porte de poulailler, de prendre des mesures précises avant de choisir un modèle.
Déterminez la catégorie à laquelle vous appartenez, puis lisez la section correspondante ci-dessous.
Ce que vous devez mesurer
Munissez-vous d'un mètre ruban, d'une balance ou d'une estimation raisonnable du poids, ainsi que de quoi écrire. Chaque mesure ci-dessous sera directement intégrée au modèle d'invite d'IA présenté plus loin dans ce guide.
Pour les applications de levage direct / poussée-traction

- Poids de l'objet (lbs). Si possible, pesez-le. Sinon, faites une estimation prudente : arrondissez au supérieur. Prenez en compte tout élément fixé à l’objet et qui se déplace avec lui, comme la quincaillerie, les panneaux, les accessoires ou les composants du support de télévision.
- Distance parcourue — longueur de votre coup de poignet (pouces). Mesurez la distance totale que l'objet doit parcourir entre sa position de départ et sa position d'arrivée. Cette mesure correspond à votre course minimale. Vous pouvez également considérer cette étape comme une simple donnée d'entrée pour un calculateur de course d'actionneur : la distance parcourue mesurée correspond à la course nécessaire.
- Nombre d'actionneurs. Combien de vérins seront nécessaires ? Un seul vérin, centré sous la charge, convient à de nombreux projets. Pour les plateformes plus larges, les tables et les supports de télévision, on utilise généralement deux vérins, un de chaque côté, afin de maintenir l’horizontalité.
- Orientation de montage. L'actionneur exerce-t-il une poussée verticale, latérale ou oblique ? Une poussée verticale s'oppose à la gravité sur toute sa course. Une poussée horizontale ne s'oppose pas à la gravité, mais peut rencontrer des frottements. Une poussée oblique se situe entre les deux.
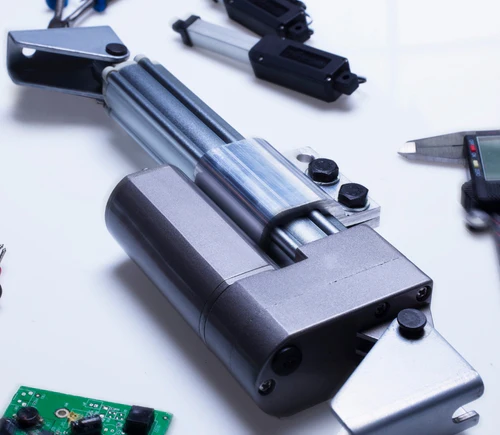
- Espace de montage disponible. Mesurez l'espace où se trouvera l'actionneur une fois complètement rétracté. Chaque actionneur possède une longueur rétractée, c'est-à-dire la longueur de l'unité lorsqu'elle est complètement fermée, qui doit s'intégrer à votre structure. Il est facile d'oublier ce détail et de s'en apercevoir à regret après la réception de l'actionneur.
Pour un levage direct, ces mesures vous aident à calculer la force de l'actionneur linéaire et à déterminer si un actionneur standard ou un actionneur linéaire renforcé est nécessaire.
Pour les applications à charnières/pivotantes

C'est là que la géométrie entre en jeu. Vous avez affaire à un panneau qui pivote autour d'une charnière, et l'actionneur relie un point fixe du châssis à un point du panneau mobile. La position de ces deux points de fixation, par rapport à la charnière, détermine tout : la force nécessaire à l'actionneur, la course requise et la compatibilité géométrique du système.
Voici ce qu'il faut mesurer :
- Poids du panneau (lbs). Poids total de la trappe, du couvercle ou de la porte. Pesez-la si possible.
- Longueur du panneau (pouces). La distance entre le bord de la charnière et le bord libre du panneau, c'est-à-dire le bord qui s'ouvre, constitue le bras de levier qui détermine le couple appliqué par la gravité.
- Largeur du panneau (pouces). La largeur du panneau est importante. Ce critère est déterminant si vous devez choisir entre un actionneur centré ou deux actionneurs de chaque côté.
- Emplacement de la charnière. Où se situe la charnière ? Sur le bord supérieur, là où le panneau se soulève comme un capot de voiture ; sur le bord inférieur, là où le panneau se rabat comme un hayon ; ou sur le bord latéral, là où le panneau s’ouvre latéralement comme une porte. Cela indique à l’IA le sens d’action de la gravité.
- Point de fixation fixe de l'actionneur. Où la base de l'actionneur sera-t-elle fixée à la structure fixe ? Mesurez deux éléments à partir de la charnière : la distance perpendiculaire par rapport à l'axe de la charnière (en pouces) et le décalage le long de l'axe de la charnière, le cas échéant.
- Point de montage du panneau d'actionneur. Où l'actionneur sera-t-il fixé au panneau mobile ? Mesurez la distance entre la charnière et ce point de fixation sur la surface du panneau, en pouces. Cette mesure est cruciale : plus l'actionneur est éloigné de la charnière, moins il aura besoin de force, mais plus sa course sera longue. À l'inverse, plus il est proche de la charnière, plus la force nécessaire sera importante et la course plus courte.
- Angle d'ouverture souhaité (degrés). Jusqu'à quel angle d'ouverture souhaitez-vous que le panneau s'ouvre ? Une trappe s'ouvrant à 90° vers le haut est courante. Certaines applications nécessitent 45°, d'autres 110°. Cette mesure est particulièrement importante si vous utilisez un calculateur d'angle d'actionneur linéaire pour comparer différentes positions de montage.
- Nombre d'actionneurs. Un ou deux ? Deux actionneurs, un de chaque côté, réduisent de moitié la force requise par actionneur et offrent une meilleure stabilité.
- Source d'alimentation disponible. Quelle tension avez-vous à disposition ? La plupart des projets d’amateurs utilisent du 12 Vcc, courant dans les véhicules, les bateaux et les systèmes à batterie, ou du 24 Vcc, souvent utilisé dans les installations domestiques avec une alimentation secteur.
- Environnement. Où sera installé cet appareil ? En intérieur, en extérieur sous un abri, ou exposé aux intempéries ? Cela détermine l’indice de protection (IP) nécessaire, c’est-à-dire le niveau d’étanchéité requis. Pour une installation extérieure, choisissez un actionneur linéaire extérieur avec l’indice de protection (IP) adapté à l’environnement.
Étape 1 : Calculez vos spécifications principales grâce à l’IA
Maintenant que vous avez vos mesures, collez l'un des modèles d'invite suivants dans un chatbot IA. Remplissez les champs entre crochets avec vos valeurs numériques, et l'IA calculera la force nominale de l'actionneur, la course et la faisabilité du montage pour votre projet.
Vous pouvez utiliser ces modèles, tels qu'un calculateur de vérin linéaire simple, un calculateur de vérin, un calculateur de dimensionnement de vérin ou un calculateur de taille de vérin linéaire, pour estimer la force, la course, l'indice de protection IP et la compatibilité avant de choisir un modèle spécifique. Ils peuvent également vous aider à calculer la force du vérin linéaire en fonction de votre type de projet.
Modèle d'invite A : Levage direct / Poussée-traction

J'ai besoin d'aide pour dimensionner un vérin linéaire pour une application de levage direct. Voici les détails :
DÉTAILS DE L'APPLICATION :
- Ce que je déplace : [décrire l'objet, par exemple « une plateforme en bois », « un panneau de fixation pour téléviseur »]
- Poids total de l'objet : [X] livres
- Distance à parcourir : [X] pouces, distance à parcourir
- Orientation de montage : [levage vertical / poussée horizontale / incliné — préciser l'angle si connu]
- Nombre d'actionneurs partageant la charge : [1 / 2 / 3 / 4]
- Tension disponible : [12 Vcc / 24 Vcc]
- Environnement : [intérieur / extérieur couvert / extérieur exposé à la pluie / immergé]
CE QUE JE VOUS DEMANDE DE CALCULER :
- Pour déterminer la force minimale requise par actionneur, appliquez un coefficient de sécurité linéaire de 2x à la charge calculée.
- Course minimale. Utilisez cette fonction comme un calculateur de course d'actionneur pour confirmer la distance de déplacement requise.
- Quel indice de protection IP dois-je rechercher pour mon actionneur linéaire en fonction de mon environnement ?
- Avez-vous des inquiétudes concernant ma configuration, par exemple, dois-je me soucier de la charge latérale de l'actionneur linéaire, du flambage ou de la stabilité ?
Veuillez détailler vos calculs afin que je puisse suivre les calculs et comprendre comment calculer la force de l'actionneur linéaire pour cette configuration.
Modèle d'invite B : Application à charnière/pivotante

J'ai besoin d'aide pour dimensionner un actionneur linéaire pour une application à charnière. L'actionneur ouvrira et fermera un panneau pivotant autour d'une charnière. Voici les détails :
DÉTAILS DU PANNEAU :
- Description du panneau : [décrivez-le, par exemple : « une trappe en contreplaqué », « une porte de cave en acier », « une porte de poulailler »]
Poids total du panneau : [X] livres
- Longueur du panneau, du bord de la charnière au bord libre : [X] pouces
- Largeur du panneau : [X] pouces
- Emplacement de la charnière : [bord supérieur / bord inférieur / côté gauche / côté droit]
GÉOMÉTRIE DE MONTAGE DE L'ACTIONNEUR :
- Point de fixation fixe, sur le cadre immobile :
- Distance par rapport à la ligne de charnière : [X] pouces perpendiculairement à la charnière
- Décalage le long/en dessous de la ligne de charnière : [X] pouces, distance à laquelle le support fixe se trouve en dessous ou à côté de la charnière
- Point de fixation du panneau :
- Distance de la charnière le long de la surface du panneau : [X] pouces
- Angle d'ouverture souhaité : [X] degrés
- Nombre d'actionneurs : [1 / 2 — un de chaque côté]
ÉNERGIE ET ENVIRONNEMENT :
- Tension disponible : [12 Vcc / 24 Vcc]
- Environnement : [intérieur / extérieur couvert / extérieur exposé à la pluie]
CE QUE JE VOUS DEMANDE DE CALCULER :
- Pour déterminer la force requise de l'actionneur, appliquez un coefficient de sécurité linéaire de 2 à la force maximale mesurée à l'angle le plus défavorable pendant la course. Utilisez cet outil comme calculateur de force linéaire pour comprendre la force maximale requise.
- La course requise dépend de la géométrie de montage.
- La longueur rétractée de l'actionneur, afin que je puisse vérifier qu'il s'adapte bien en position fermée.
- Quel indice de protection IP me faut-il pour l'actionneur linéaire, en fonction de l'environnement ?
- Vérifiez si les positions de montage choisies sont mécaniquement correctes — signalez tout problème comme un mauvais effet de levier, des angles extrêmes, un risque de blocage ou une charge latérale sur l'actionneur linéaire.
Veuillez détailler vos calculs étape par étape, y compris l'analyse du couple à l'angle le plus défavorable, afin que je puisse suivre.
Exemple pratique : Porte de poulailler à charnière supérieure
Voici à quoi ressemble une invite remplie pour un projet réel, afin que vous puissiez voir comment le modèle fonctionne en pratique.
Projet : Un poulailler possède une porte en contreplaqué à charnières supérieures que le propriétaire souhaite automatiser. Voici un exemple de système d'actionneur pour porte de poulailler automatisée. La porte mesure 18 pouces de haut (de la charnière au bord libre), 24 pouces de large et pèse environ 3,6 kg. La charnière est située sur le bord supérieur. Le propriétaire souhaite une ouverture à 90°, de l'horizontale à la verticale. Il prévoit d'utiliser un actionneur monté sur le côté droit, sa base fixe étant fixée au cadre du poulailler à 2 pouces sous la charnière et à 1 pouce du mur. L'autre extrémité est fixée à la porte à 14 pouces de la charnière, le long de la surface du panneau. Le poulailler est installé à l'extérieur et exposé aux intempéries. Il est alimenté par une batterie 12 V.
Ce type de projet d'actionneur de porte de poulailler est un exemple courant d'actionneur linéaire pour application sur porte à charnières, car la force change lorsque le panneau tourne autour de la charnière.
L'invite remplie :
J'ai besoin d'aide pour dimensionner un actionneur linéaire pour une application à charnière. L'actionneur ouvrira et fermera un panneau pivotant autour d'une charnière. Voici les détails :
DÉTAILS DU PANNEAU :
- Ce panneau est en fait une porte de poulailler en contreplaqué.
- Poids total du panneau : 3,6 kg
- Longueur du panneau, bord de la charnière au bord libre : 18 po
- Largeur du panneau : 24 po
- Emplacement de la charnière : bord supérieur
GÉOMÉTRIE DE MONTAGE DE L'ACTIONNEUR :
- Point de fixation fixe, sur le cadre immobile :
- Distance par rapport à l'axe de la charnière : 1 po perpendiculaire à la charnière, vers l'extérieur du mur
- Décalage le long/sous la ligne de charnière : 2 points, sous la charnière
- Point de fixation du panneau :
- Distance de la charnière le long de la surface du panneau : 14 po
- Angle d'ouverture souhaité : 90 degrés
- Nombre d'actionneurs : 1
ÉNERGIE ET ENVIRONNEMENT :
- Tension disponible : 12 Vcc
- Environnement : extérieur exposé à la pluie
CE QUE JE VOUS DEMANDE DE CALCULER :
- Pour déterminer la force de réaction requise de l'actionneur, appliquez un facteur de sécurité linéaire de 2x à la force de crête à l'angle le plus défavorable pendant la course.
- La course requise dépend de la géométrie de montage.
- La longueur rétractée de l'actionneur, afin que je puisse vérifier qu'il s'adapte bien en position fermée.
- Quel indice de protection IP me faut-il pour l'actionneur linéaire, en fonction de l'environnement ?
- Vérifiez si les positions de montage choisies sont mécaniquement correctes — signalez tout problème comme un mauvais effet de levier, des angles extrêmes, un risque de blocage ou une charge latérale sur l'actionneur linéaire.
Veuillez détailler vos calculs étape par étape, y compris l'analyse du couple à l'angle le plus défavorable, afin que je puisse suivre et comprendre comment calculer la force de l'actionneur linéaire pour cette configuration articulée.
Ce que l'IA calculera pour vous : Pour cette porte de poulailler, le couple gravitationnel maximal se produit lorsque la porte est horizontale, au début de son ouverture ou sur le point de sa fermeture, car c'est à ce moment que le centre de gravité du panneau est le plus éloigné de la charnière. L'IA analysera la trigonométrie de vos points de fixation spécifiques afin de déterminer la force effective que l'actionneur doit produire dans cette position critique, appliquera un coefficient de sécurité de 2, calculera la course à partir de la géométrie des deux points de fixation pendant que la porte effectue son mouvement circulaire, et indiquera si vos positions de fixation offrent à l'actionneur un avantage mécanique suffisant pour un fonctionnement fluide.
Pour une porte légère comme celle-ci, le résultat correspondra généralement à un micro-actionneur ou un mini-actionneur : force modérée et course relativement courte. Le calcul étape par étape de l’IA vous permet de vérifier la logique et d’ajuster vos points de fixation si nécessaire avant tout achat.
Étape 2 : Affinez votre sélection

Une fois que vous avez défini les spécifications essentielles (force nominale, course et indice de protection IP), il reste quelques facteurs pratiques à prendre en compte avant de choisir un actionneur. Ces facteurs n'ont aucune incidence sur la physique de votre application, mais ils déterminent le produit le plus adapté.
Vitesse. À quelle vitesse votre actionneur doit-il se déplacer ? La vitesse d'un actionneur se mesure en pouces par seconde et il existe un compromis universel : une force plus élevée implique généralement une vitesse plus faible. Si la porte de votre poulailler doit se fermer rapidement avant qu'un prédateur n'y entre, la vitesse est essentielle. Si vous soulevez un téléviseur en 15 secondes, ce n'est probablement pas le cas. Pour les projets nécessitant une synchronisation précise, un calculateur de temps de course d'actionneur peut vous aider à estimer le temps nécessaire pour déployer ou rétracter l'actionneur en fonction de la longueur de course et de la vitesse. Déterminez vos besoins avant d'acheter.
Cycle de service. À quelle fréquence l'actionneur fonctionnera-t-il et pendant combien de temps à chaque fois ? Un actionneur qui ouvre une trappe deux fois par jour a des exigences très différentes de celles d'un actionneur fonctionnant toutes les quelques minutes dans un système automatisé. La plupart des applications de loisirs sont peu exigeantes, mais si votre actionneur fonctionne fréquemment, choisissez-en un conçu pour des cycles de service plus longs afin d'éviter une usure prématurée.
Longueur et ajustement physique réduits. Cela surprend souvent. L'actionneur possède un corps qui doit pouvoir s'insérer dans votre structure une fois complètement replié. Un actionneur à course de 30 cm (12 pouces) ne se replie pas comme par magie : sa longueur entre les trous de fixation, une fois rétracté, est généralement supérieure de quelques centimètres à sa course. Assurez-vous de sa compatibilité. Consultez la fiche technique du produit pour connaître la dimension entre les trous de fixation avant de commander.
Bruit. Certains actionneurs sont plus bruyants que d'autres. Si votre projet se situe dans un espace de vie, une chambre ou tout autre endroit où le bruit est un facteur important, tenez-en compte. Les actionneurs à vis trapézoïdale sont généralement plus silencieux que ceux à vis à billes, bien que ces derniers soient plus performants sous fortes charges.
Commentaires sur la position. Avez-vous besoin de connaître précisément la position de l'actionneur lors de sa course ? Si vous souhaitez arrêter l'actionneur à des positions intermédiaires, et non seulement en position complètement ouverte ou fermée, vous aurez besoin d'un actionneur avec retour d'information intégré : un potentiomètre ou un capteur à effet Hall. Si vous n'avez besoin que de l'extension et de la rétraction complètes, les interrupteurs de fin de course intégrés, généralement présents sur la plupart des actionneurs, suffisent.
Chargement latéral. Les actionneurs linéaires sont conçus pour des charges axiales (poussée et traction en ligne droite). Si la géométrie de montage génère des forces latérales importantes (charges perpendiculaires à l'axe de l'actionneur), ce dernier s'usera plus rapidement et risque de tomber en panne prématurément. L'alerte de l'IA à l'étape 1 signalera tout problème de géométrie, mais il est important d'en tenir compte lors du choix définitif des positions de montage. Il est particulièrement important d'éviter les charges latérales sur les actionneurs linéaires pour les portes à charnières, les trappes et les projets d'automatisation extérieure.
Une fois que vous avez pris en compte les facteurs ci-dessus, vous pouvez coller cette invite de suivi dans la même conversation avec l'IA pour affiner davantage vos spécifications :
D’après les spécifications de l’actionneur que vous venez de calculer, j’ai quelques exigences supplémentaires :
EXIGENCES SUPPLÉMENTAIRES :
- Préférence de vitesse : [rapide / modérée / lente — ou vitesse spécifique comme « au moins 1 po par seconde »]
- Cycle de service : [à quelle fréquence il fonctionnera, par exemple « deux fois par jour », « toutes les 10 minutes », « quelques fois par semaine »]
- Sensibilité au bruit : [pas un problème / préfère le calme / doit être très silencieux]
- Besoin de commentaires sur la position : [oui — je dois m’arrêter aux positions intermédiaires / non — seulement complètement ouvert et complètement fermé]
- Longueur maximale rétractée compatible avec mon espace : [X] pouces, à mesurer à partir de votre structure
Compte tenu de ces contraintes supplémentaires, veuillez affiner vos recommandations.
Spécifiquement:
- Quelle plage de vitesses dois-je rechercher ?
- Quel doit être le cycle de service de l'actionneur ?
- Dois-je rechercher un actionneur avec retour d'information intégré, et si oui, de quel type ?
- La longueur rétractée d'un actionneur typique avec ces spécifications tiendra-t-elle dans mon espace ?
- Existe-t-il des compromis dont je devrais être conscient, par exemple, les modèles à force plus élevée étant plus lents ?
Conseils pour de meilleurs résultats

Ajoutez toujours une marge de sécurité. Les modèles d'invite ci-dessus indiquent à l'IA d'appliquer un coefficient de sécurité de 2 à la force calculée, et nous vous recommandons de conserver ce coefficient. Les conditions réelles (friction, prise au vent, défaut d'alignement, gonflement du matériau dû à l'humidité) ajoutent des forces difficiles à prévoir avec précision. Un coefficient de sécurité de 2 pour un actionneur linéaire signifie que celui-ci fonctionne en mode de charge minimale plutôt qu'à sa limite. Cela prolonge considérablement sa durée de vie et vous offre une marge de sécurité en cas d'imprévu.
Itérer sur les positions de montage. Si l'IA indique que la force requise est très élevée, essayez d'éloigner le point de fixation du panneau de la charnière. Cela augmente le bras de levier de l'actionneur et réduit la force nécessaire, même si cela allonge la course. Il y a toujours un compromis à faire, et l'IA peut recalculer rapidement si vous modifiez une mesure.
Vérifiez une dernière fois la longueur rétractée. Avant de commander, consultez la fiche produit ou la fiche technique de l'actionneur qui vous intéresse et vérifiez sa longueur entre les trous de fixation une fois rétracté. Assurez-vous qu'il s'intègre correctement dans votre structure une fois replié. C'est la principale raison pour laquelle les amateurs retournent les actionneurs.
Arrondir au supérieur, pas à l'inférieur. Lorsqu'il s'agit de choisir entre deux forces nominales d'actionneur, privilégiez toujours la plus élevée. Un actionneur fonctionnant bien en deçà de sa force nominale maximale chauffe moins, dure plus longtemps et résiste mieux aux variations de charge. Pour les applications à forte charge, cela peut vous amener à opter pour un actionneur linéaire renforcé, mais uniquement si la force nominale calculée et les conditions du projet l'exigent.
Prêt à faire vos achats ?
Une fois que vous avez vos spécifications (force, course, tension et indice de protection IP), parcourez notre gamme Catalogue d'actionneurs linéaires Utilisez les filtres pour affiner votre recherche. Chaque fiche produit contient des données techniques détaillées indiquant les longueurs rétractée et déployée, les courbes de force, les vitesses nominales et les informations sur le cycle de service.
Vous ne savez pas quel modèle précis convient à votre application ? Contactez notre équipe Nous serons ravis de vous aider à trouver le produit idéal en fonction de vos spécifications. Si vous comparez les options de Progressive Automations, vous pouvez utiliser vos spécifications pour affiner votre recherche d'un actionneur linéaire Progressive Automations en fonction de la force, de la course, de la tension, de la vitesse et des caractéristiques environnementales.


Vous aurez besoin du poids de votre couvercle ou de votre charge, de l'angle d'ouverture maximal, des dimensions de la boîte ou du couvercle et du nombre d'actionneurs que vous prévoyez d'utiliser.
La calculatrice fournit des estimations de référence fiables basées sur des principes mécaniques. Ces résultats sont idéaux pour la conception préliminaire et la planification de prototypes.
Oui. Ces outils sont conçus pour une grande polyvalence et s'adaptent à une vaste gamme d'applications, de la domotique aux systèmes marins, en passant par la robotique et les machines industrielles. Que votre installation nécessite de soulever ou d'ouvrir en angle (couvercles, trappes, etc.) ou de déplacer des charges verticalement et horizontalement (tables, portes, plateformes, etc.), les calculateurs vous aident à déterminer la taille idéale de l'actionneur et les performances requises pour votre système de mouvement.
Vous pouvez ajuster les paramètres d'entrée tels que la course ou la force, ou contacter notre équipe pour obtenir de l'aide dans le choix de l'actionneur adapté à vos exigences en matière de charge et de couple.

Connaissances
Article de blog
Calculs simplifiés pour le choix des paramètres de l'actionneur
La mise en œuvre d'un actionneur linéaire implique de prendre en compte des aspects électriques et mécaniques. Le choix de la taille et de la force appropriées peut parfois s'avérer complexe.

Article de blog
Comment monter efficacement un actionneur linéaire sur une trappe ?
L'une des étapes les plus importantes dans le choix d'un actionneur linéairechoisir la force nominale appropriée.
